

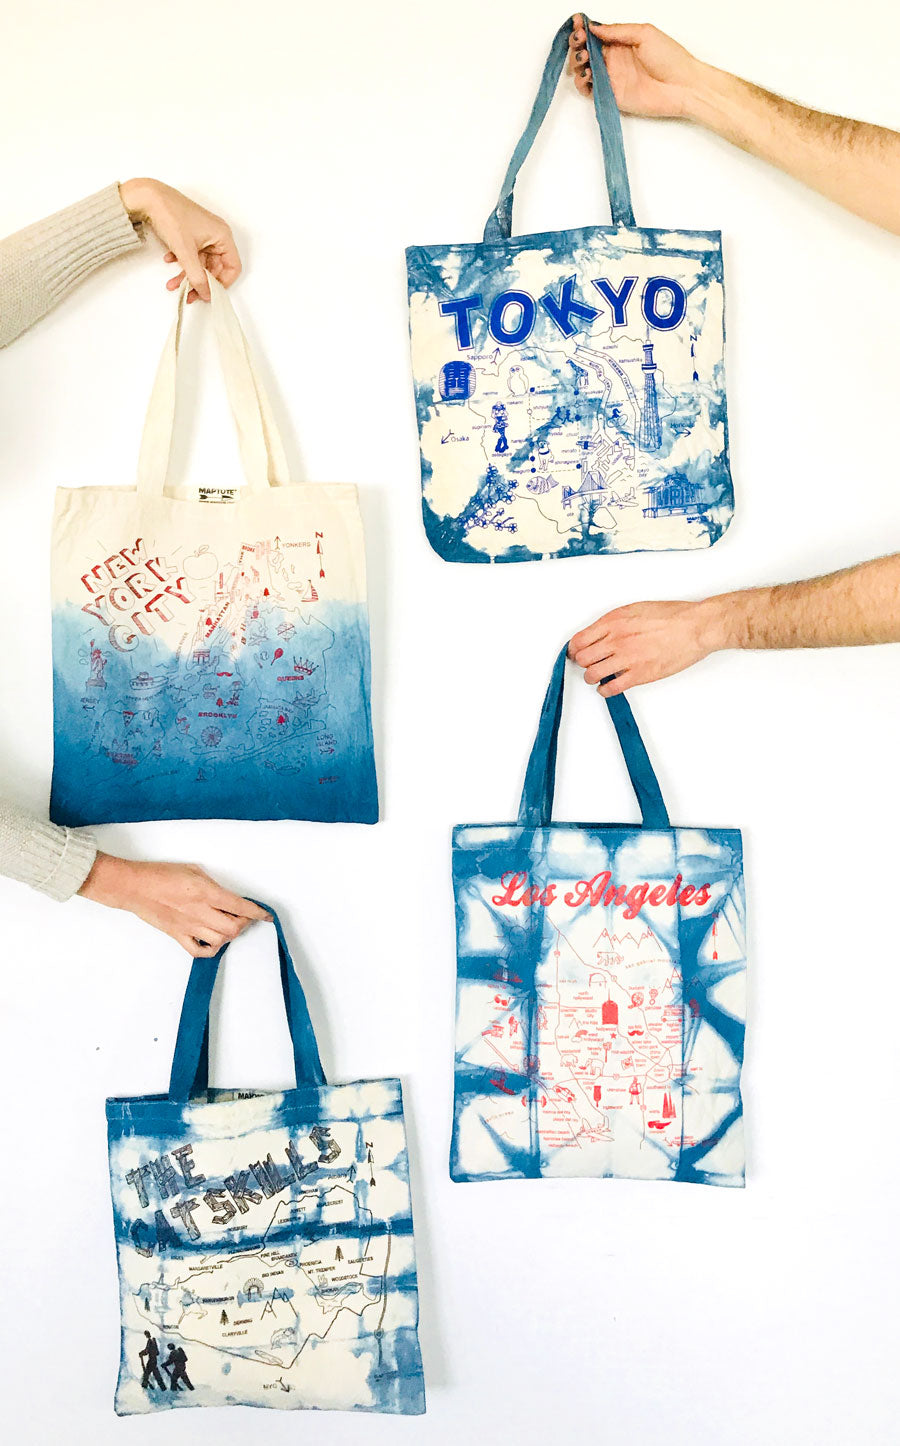

Add some color to your favorite Maptote with this fun Indigo Dye DIY! It’s the perfect way to re-vamp your old totes and give new life to your beloved totes. Here at the Maptote offices, we took this opportunity to use up some of our samples and slightly damaged merchandise (so do note that some of these map designs are not available for sale!). We chatted with our friends over at Apprvl to get the inside scoop on best dye practices! Read on for a step by step tutorial using Apprvl’s At- Home Indigo Dye Kit.

Materials
Medium Sized Bucket
Large Bucket or Container
100% Cotton Totes, Onesies, natural pouches, etc
Light Detergent or Dish Soap
Binder clips, twine, extra rubber-bands (optional)
Directions
Step 1: Empty indigo, thiox and soda ash packets from kit into your medium sized bucket filled with warm water and stir slowly. Cover with a lid or plastic for about 20 minutes.
Step 2: Fill the large container with warm water and few drops of a light detergent (we used Myer’s Dish Soap). Soak your totes for about 20 minutes, squeeze out excess water, so you are ready to fold!

Step 3: There are many traditional shibori pattern techniques. When you purchase Apprvl’s kit you will get exclusive access to some of her top secret tips and tricks. We experimented with folding and dipping techniques here at Maptote. Folding the fabrics in an accordion style will give you grid-like patterns. While scrunching and twisting will give you a more abstract tie-dye effect. But most importantly be creative and have fun!

Step 4: Use the rubber bands, wood blocks, string, and binder clips to clamp your fabric together and create resist patterns. The kit comes with some supplies, but we added some more rubber-bands, twine and binder clips to the mix.
Step 5: We are ready to dip and dye! First, uncover your bucket of indigo. You will find that a bubbly film has formed (it might even be a little smelly!) But that’s all good! With your gloves on dip your bundled products into the dye bath. Gently move them around beneath the surface. You can submerge them from 30 seconds to a few minutes, the longer they are in the dye the darker it will be.

Step 6: We kept some totes un-bound and just dipped the edges to create a dip dye/ombre pattern. To do this hold your tote by the handles and gently dip the edge into the dye bath for 30 seconds, pull out and continue to do a few times. Each time dunk the tote little farther into the dye.
Step 7: After your bundles have been submerged in the dye bath, take them out and let them rest on a tarp or table. You will see that they are bright yellow and green! It will take about 20 minutes for the dye to oxidize and turn to that beautiful deep blue.

Step 8: After the bundles have oxidized, it is now time to rinse and wash. Rinse and wring until the products run clear. You can use a light detergent, if wanted.
Step 9: Hang to dry and tote around! Please note there will be some shrinkage on our 100% USA Made cotton totes. Your fabrics may also dry a bit wrinkly. But no worries, they will bounce back to their size after ironing! Using the steam setting on the iron flip your totes to the backside or inside-out and work that iron (do not iron over ink, as it may bleed)! Enjoy!

Be sure to comment below or tag us on Instagram @Maptote if you dye your Maptotes! We would love to see all your creations.