

After over a year of separation, gatherings are back just in time for summer! While just being together again is exciting enough, these DIY garlands will add even more spice and spirit to any bash.

For each of these garlands, start out with a piece of string. You can make it as long or as short as you like. Make sure to tie loops on both ends to make it easier to hang up!

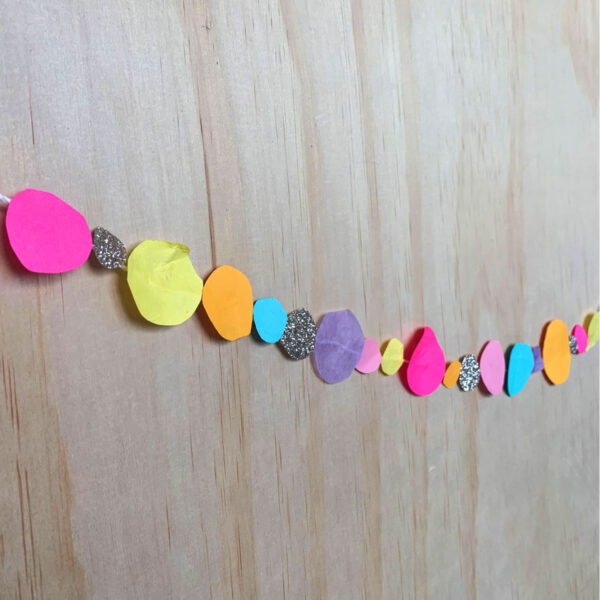
For the polka dot garland you will need:
1.) Lots of circles in various shapes and colors (Try using a mix of construction paper, tissue paper, glitter paper, etc. to add different textures- the hodgepodge look gives off a really fun effect!)
2.) Clear-drying glue

Add a dollop of glue to the back of a circle and place on the string. Continue to add circles one after another, following a pattern- or not, like we did!
After filling up the string with your dots, let it sit while it dries completely.

And voila! You’ve got yourself a spunky dot garland that will add vibrance to any event!

When life gives you lemons… make a lemon garland!
For the lemon garland you will need:
1.) Yellow and green construction paper
2.) Clear-drying glue

Start by cutting out your lemons. Ours were 2.5 inches lengthwise. To keep the lemons uniform in size, use your first lemon as a stencil for the rest.

Next, cut out leaf shapes using the green construction paper, again using the first one you cut out as a stencil.

After attaching the leaves to the lemons, place a dollop of glue on the back of the tip of the lemon. Arrange on the string and let sit until it is completely dry.

Yay! Easy peasy lemon squeezy.

Celebrating a birthday? This adorable garland will be the perfect addition to your party.
You will need:
1.) Construction paper
2.) Mini pom poms
3.) Clear-drying glue

Begin by cutting out semi-circles of construction paper in the colors of your choice. Feel free to change the size!

To create the hats, hold the rounded side of the semi-circle towards you and fold in both points until they overlap. Secure with glue, making sure to leave a whole in the top that is just big enough to allow your mini pom poms to sit in. Glue the bottom of the pom pom and stick on the hat.
Let the hats dry completely before gluing them onto the string.

Couldn’t be cuter.

And there you go! Try out any of these or use the same technique to make any garland you can think of!